

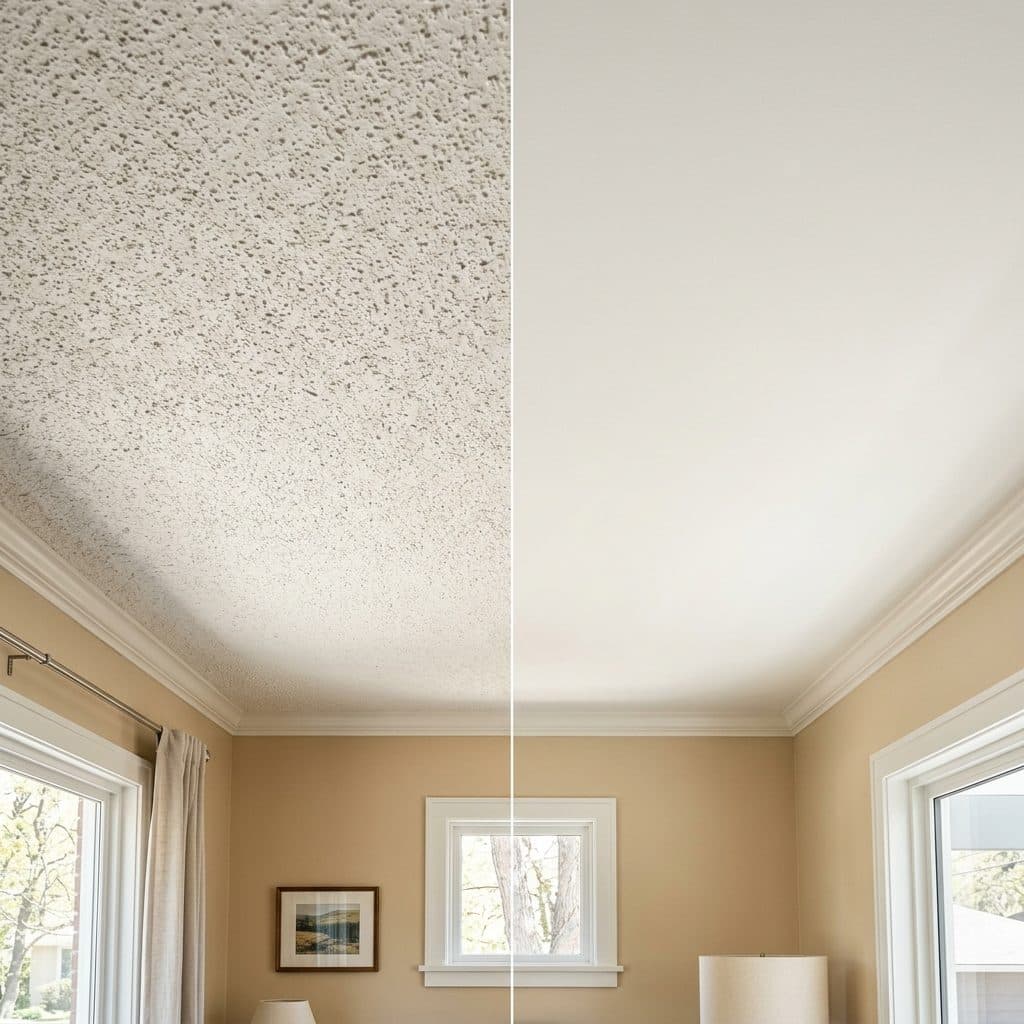
A popcorn ceiling before and after comparison usually shows two photos: bumpy and dated, then smooth and bright. What it does not show is everything that happens in between.
Removal is a real process with a few distinct stages, and each one looks different from the last. Knowing what to expect at every point helps you plan around the project, instead of being surprised halfway through it.
This guide walks through what a popcorn ceiling actually looks like before removal starts, right after the texture comes off, during repair, and once paint goes on. It also covers timeline, cost factors, and what tends to catch homeowners off guard.
Key Takeaways
Stage One: What a Popcorn Ceiling Looks Like Before Removal
Most popcorn ceilings share a few traits, regardless of the room or the age of the house. The texture often looks yellowed or dusty, especially near light fixtures where heat and grime collect over the years. Overhead light casts small shadows across every bump, which can make a room feel lower and dimmer than it actually is.
If your home was built before the mid-1980s, testing for asbestos is the real first step, not scraping. The EPA recommends sampling by a trained professional before any renovation that would disturb a suspect material. A lab test on a small sample is quick and worth doing before anything else starts. Our popcorn ceiling removal cost guide breaks down what testing and removal typically run in the Twin Cities.
Stage Two: What the Ceiling Looks Like Right After Scraping
This stage catches a lot of homeowners off guard, and it is worth preparing for. Right after the texture comes off, the ceiling almost always looks worse, not better.
Nail pops, old seams, and rough patches that the texture used to hide are now fully visible. Drywall paper may look torn or uneven in spots, especially where the popcorn was applied thick or where a previous owner patched a section without matching the texture around it. The surface can look rough, mottled, and uneven under bright light.
This is normal. It is not a sign that something went wrong during scraping. Every popcorn ceiling was originally sprayed on partly to hide these exact imperfections, so removing the texture simply uncovers what was always underneath.
If the ceiling was painted before removal, this stage often takes a little longer. Painted texture resists water, which makes scraping slower and can leave more surface damage behind than an unpainted ceiling would.
Stage Three: Ceiling Repair After Popcorn Removal
Repair work happens here, after scraping and before any paint goes on. This step is what actually makes the ceiling look finished, and it is often underestimated by anyone who has not done this kind of work before.
Older Twin Cities homes often carry settling cracks and popped fasteners that the popcorn texture was hiding for years. Once the texture is gone, those issues need to be reset, patched, and sanded smooth before the ceiling is ready for primer. Our guide on painting older homes in the Twin Cities covers more on what these older ceilings and walls tend to need, and why prep work matters more on a home with decades of settling behind it.
A skim coat, a thin layer of joint compound spread across the full ceiling, is often what separates a passable result from a genuinely smooth one. Scraping alone rarely leaves a perfectly flat surface, and a skim coat fills in the small ridges and scrape marks that paint by itself would only highlight.
| Repair Type | What It Fixes | How Common |
|---|---|---|
| Patching nail pops | Fasteners that worked loose over time | Very common |
| Skim coating | Uneven texture or rough scrape marks | Common |
| Crack repair | Settling cracks along seams | Common in older homes |
Stage Four: What the Ceiling Looks Like After Paint
This is the payoff stage, and it is where the real popcorn ceiling makeover shows up. A smooth ceiling reflects light evenly instead of casting small shadows in every direction. Rooms tend to feel taller and brighter right away, often more than homeowners expect from a single ceiling change.
Sheen matters here more than most people realize. Flat ceiling paint hides small imperfections best, which is useful since few scraped and skimmed ceilings come out perfectly flat under close inspection. A higher sheen, like eggshell or satin, reflects more light at an angle and can actually draw attention to any unevenness that remains.
Durahome applies two coats of Sherwin-Williams product for this step, chosen based on the ceiling condition and how much light the room gets. A well-lit room with south-facing windows shows more surface detail than a hallway or a bedroom, which sometimes changes the sheen recommendation from room to room.
How Long the Whole Process Takes?
A single room, from scraping through the final coat, usually takes one to two days. That includes prep, removal, patching, priming, and paint, though drying time between steps affects the exact schedule.
A whole home takes longer, and the timeline depends on more than square footage. Heavy paint layers, water damage, or asbestos that requires licensed abatement all add time before the transformation even begins.
What to Expect That Nobody Tells You?
A few things are worth knowing before you start, whether you hire it out or do it yourself.
It is a dusty job, even with careful prep. Plastic sheeting and containment help, but some dust always finds its way past the edges. Furniture needs to be moved out of the room entirely or fully covered, not just pushed to one side and draped with a sheet.
The room stays out of use while work is active, though the rest of the house usually stays livable during a room-by-room project. If asbestos abatement is involved, that timeline extends, since the area needs to be sealed and cleared before anyone can safely reenter.
None of this is a surprise Durahome tries to soften after the fact. Setting these expectations upfront, before the first scrape, is part of how every project gets planned.
Why Homeowners Trust Durahome for Popcorn Ceiling Removal?
Knowing what to expect is one thing. Having a crew manage it well is another.
One Group Text - production manager, owner, estimator, and crew foreman in one thread from day one
The Same Crew - around 90% painter retention, most with close to a decade of experience
Sherwin-Williams - premium products throughout every project
2-5 Year Written Warranty - scaled to the scope of the job
If you are still weighing whether removal is worth it, our page on the benefits of popcorn ceiling removal goes deeper into that decision.
The Real Transformation Happens Between Scrape and Paint
The photos only show the start and the finish. The stages in between, the rough scrape, the repair, the priming, are where the actual work happens and where the final result gets decided.
If you are ready to see what your ceiling could look like, request your free estimate or call (612) 800-0273 to talk through your project.
Frequently Asked Questions
Does every popcorn ceiling need to be tested for asbestos?
If your home was built or last finished before the mid-1980s, yes. Testing is quick, affordable, and the responsible first step before any scraping begins.
Will the ceiling look perfectly smooth after removal?
Not always without a skim coat. Scraping alone can leave minor texture or marks behind, which is why repair and smoothing matter before paint goes on.
Can one room be done without redoing the whole house?
Yes. Many homeowners start with one room, like a living room or primary bedroom, and expand later if they like the result.
What paint sheen works best on a newly smoothed ceiling?
Flat paint is the most forgiving choice. It hides small imperfections better than eggshell or satin finishes would on a ceiling.
Is it messy to live in the house during the process?
The active work area gets dusty and stays off limits while a crew is in it, but the rest of the home is typically fine to use throughout the project.